How to install Windows 98NOTE:
This article is for informational use only. It does not contain any troubleshooting information. If you are searching for troubleshooting information that is not mentioned in this article, search the Microsoft Knowledge Base againOn This Page
SUMMARY
MORE INFORMATION
Before Purchasing Windows 98
Before Installing Windows 98
Installing Windows 98
Common Windows 98 Setup Issues
Highlights for Windows Web Site
SUMMARY
loadTOCNode(1, 'summary');This article provides general information about installing Windows 98. This information can help you avoid problems that might arise during the installation process and help make the installation process as smooth as possible.
MORE INFORMATION
loadTOCNode(1, 'moreinformation');Before Purchasing Windows 98Before you purchase Windows 98, make sure that your computer meets the minimum hardware requirements for running Windows 98.
The minimum hardware requirements include:•486DX 66 megahertz (MHz) or faster processor (Pentium recommended)
•16 megabytes (MBs) of memory (24 MB recommended)
•120 MB of free hard disk space (typical installation requires approximately 195 MB of free hard disk space, but the required space may vary from 120 MB to 295 MB, depending on your computer's configuration and the options that you choose to install)
•CD-ROM or DVD-ROM drive
•3.5-inch high-density floppy disk drive
•Video adapter and monitor that support video graphics adapter (VGA) or higher resolution
•Microsoft Mouse or compatible pointing deviceAlthough Windows 98 includes more than 1,200 new drivers, not all third-party manufacturers' hardware drivers are compatible with Windows 98.
Some older computers or devices may require an updated basic input/output system (BIOS) or device driver to fully support Windows 98.
You can use the Windows 98 Upgrade version to upgrade Microsoft Windows version 3.1x, Microsoft Windows for Workgroups version 3.1x, or Microsoft Windows 95 or later to Windows 98.
If Windows 3.1x, Windows for Workgroups 3.1x, or Windows 95 is not currently installed, you can use the Windows 98 Upgrade Setup program to install Windows 98 if you can provide the disks or CD-ROM from an earlier version of Windows to confirm your eligibility for the upgrade. Because the Windows 98 Upgrade version does not include a Startup disk, you must be able to start from the computer's hard disk to install the Windows 98 Upgrade.
To install the non-upgrade version of Windows 98, you do not need an earlier version of Windows or MS-DOS. Because the non-upgrade version of Windows 98 includes a Startup disk, you do not need to be able to start from the computer's hard disk.Before Installing Windows 98Before you upgrade your existing version of Windows to Windows 98, perform the following steps:
•Read the Setup.txt file in the Win98 folder on the Windows 98 CD-ROM, and perform any additional preinstallation steps as suggested.
•Make sure that your computer is not infected with a virus. To do so, run an antivirus program that has the latest virus signatures and allow the program to remove any viruses that it finds.
•Disable any programs that run automatically, including antivirus programs, screen savers, and system utilities. After Setup is finished, you can re-enable these programs.
•Uninstall any utilities or tools that protect or encrypt the master boot record (MBR) or partition table (for example, uninstall the Bootlock utility that is included with Symantec Norton Your Eyes Only). Make sure that you check with the software manufacturer before you reinstall the program to make sure that the version that you want to install is compatible with Windows 98.
•Back up all critical data on your hard disk. Although it is unlikely that you will encounter a serious problem when you install Windows 98, it is always a good idea to perform a complete system backup before you install a new operating system. When you upgrade your computer's operating system, an error might occur (such as a problem that is the result of incompatible hardware or a power failure) that could temporarily or permanently prevent you from gaining access to the data on your hard disk.Installing Windows 98If you want to install Windows 98 on a computer that does not have an installed operating system, go to http://support.microsoft.com/kb/221829/EN-US/
If you are upgrading Windows 95, start Windows 95, and then insert the Windows 98 CD-ROM. Follow the instructions on your screen to install Windows 98.If you are not upgrading Windows 95, see the appropriate section of the Windows 98 Setup.txt file for specific installation instructions.
Posted by donald at 1:55 AM 0 comments Links to this post
Labels: Installing Windows 98
How to install Windows Vista
On This Page
SUMMARY
INTRODUCTION
MOREINFORMATION
Upgrade to Windows Vista
Recommended minimum hardware requirements for Windows Vista
Operating system requirements to upgrade to Windows Vista
Windows Vista Upgrade Advisor
Upgrade procedure
The Upgrade option is unavailable, and you receive an
"Upgrade has been disabled" message
Perform a clean installation of Windows VistaMethod
1: Run the Setup program after you start the computer by using the current operating systemMethod
2: Run the Setup program after you start the computer by using the Windows Vista DVDREFERENCES
SUMMARY
loadTOCNode(1, 'summary');
This article describes how to upgrade to Microsoft Windows Vista from an earlier version of Microsoft Windows and how to perform a clean installation of Microsoft Windows Vista.
To upgrade to Windows Vista, the operating system that is currently installed on the computer must be supported in the upgrade path to Windows Vista.
This article lists the operating system requirements to upgrade to Windows Vista. This article also lists some methods that you can use to troubleshoot scenarios where you receive an "Upgrade has been disabled" message when you try to upgrade to Windows Vista.
Additionally, this article describes two methods that you can use to start the Setup program to perform a clean installation of Windows Vista.
INTRODUCTION
loadTOCNode(1, 'summary');
This article contains information about how to upgrade to Windows Vista from an earlier version of Windows and how to perform a clean installation of Windows Vista.
MORE INFORMATION
Important:
To make sure that you have the best possible experience when you upgrade to Windows Vista, follow these steps:
1. Exit all applications that are open before you upgrade to Windows Vista.
This includes browsers and media players.
2. Make sure that you are connected to the Internet when you start the upgrade process.
3. When you are prompted, Get important updates for installation, click Go Online.
Upgrade procedure
loadTOCNode(3, 'summary');
To upgrade your computer to Windows Vista, follow these steps:
1. Start the computer by using the current operating system. Verify that the Microsoft Windows operating system that is currently installed on the computer is eligible for upgrade to Windows Vista.
2. Insert the Windows Vista DVD in the computer's DVD drive.
3. Use one of the following procedures, as appropriate:•
If Windows automatically detects the DVD, the Install now screen appears.
Click Install now.
•If Windows does not automatically detect the DVD, follow these steps:
a. Click Start, click Run, type Drive:\setup.exe, and then click OK.Note Drive is the drive letter of the computer's DVD drive.
b. Click Install now.
4. When you reach the Which type of installation to you want? screen, click Upgrade to upgrade the current operating system to Windows Vista.
The Upgrade option is unavailable, and you receive an "Upgrade has been disabled" messageWhen you try to upgrade to Windows Vista, the Upgrade option is unavailable. Additionally, you receive the following message:
Upgrade has been disabled
This issue may occur if one of the following conditions is true:
•The operating system that is currently installed on the computer is not supported in the upgrade path to Windows Vista.
•You did not start the computer by using the current operating system. Instead, you started the computer from the Windows Vista DVD. To resolve this issue, start the computer by using the current operating system, and then run the Setup program from the current operating system.
•The operating system is installed to a partition that uses the FAT32 file system.
To resolve this issue, convert the file system on the partition to use the NTFS file system.The partition on which you want to upgrade to Windows Vista has insufficient free hard disk space. To resolve this issue, free additional space on the hard disk.
Perform a clean installation of Windows Vista
loadTOCNode(2, 'summary');
Warning In a clean installation, existing data is removed.
This data includes personal data and settings.
After you install the operating system, you must also reinstall all programs.
Make sure that you back up personal data before you perform a clean installation.To perform a clean installation of Windows Vista, use one of the following methods.
Method
1: Run the Setup program after you start the computer by using the current operating system1. Start the computer by using the current operating system.
2. Insert the Windows Vista DVD in the computer's DVD drive.
3. Use one of the following procedures, as appropriate:
•If Windows automatically detects the DVD, the Install now screen appears.
Click Install now.
• If Windows does not automatically detect the DVD, follow these steps:
a. Click Start, click Run, type Drive:\setup.exe, and then click OK. Note Drive is the drive letter of the computer's DVD drive.
b. Click Install now.
4. When you reach the Which type of installation do you want? screen, click Custom (advanced), and then follow the instructions that are displayed on the screen to install Windows Vista.
Method
2: Run the Setup program after you start the computer by using the Windows Vista DVD
1. Start the computer by using the Windows Vista DVD. To do this, insert the Windows Vista DVD in the computer's DVD drive, and then restart the computer.
Note To start the computer from the Windows Vista DVD, the computer must be configured to start from the DVD drive.
For more information about how to configure the computer to start from the DVD drive, see the documentation that is included with the computer, or contact the computer manufacturer.
2. When the "Press any key to boot from CD" message is displayed on the screen, press a key.
3. Follow the instructions that are displayed on the screen to install Windows Vista.APPLIES TO
•Windows Vista Home Basic
•Windows Vista Home Premium
•Windows Vista Ultimate
•Windows Vista Business
•Windows Vista Enterprise
•Windows Vista Starter
Posted by donald at 1:30 AM 0 comments Links to this post
Labels: Installing Windows Vista
Assignment # 2: Installing Windows XP
How to install or upgrade to Windows XP
On This PageINTRODUCTIONUpgrade to Windows XPInstall Windows XP to a new hard diskInstall Windows XP to a new folderPerform a clean install of Windows XPPerform a multiple boot operation
INTRODUCTION
This step-by-step article describes how to install Windows XP.
Upgrade to Windows XPThis section describes how to upgrade to Windows XP from Microsoft Windows 98, Microsoft Windows Millennium Edition (Me), and Microsoft Windows 2000 Professional.
Note Before you start the upgrade process, obtain and install the latest BIOS upgrade for your computer from the computer's manufacturer.
If you update the BIOS after you upgrade the computer, you may have to reinstall Windows XP to take advantage of features such as Advanced Configuration and Power Interface (ACPI) support in the BIOS.
Update the firmware in all of your hardware devices before you start the upgrade if you can.Also, you may want to disconnect from the Internet during the installation.
Disconnecting from the Internet during the installation helps protect you from malicious users. You may also want to enable the Microsoft Internet Explorer firewall.
To upgrade Windows XP:
1. Start your computer, and then insert the Windows XP CD-ROM into the CD-ROM drive.
2. If Windows automatically detects the CD-ROM, click Install Windows to start the Windows XP Setup Wizard. If Windows does not automatically detect the CD-ROM, click Start, click Run, type the following command, and then click OK:CD-ROM drive letter:\setup.exe
3. When you are prompted to select an installation type, select Upgrade (the default setting), and then click Next.
4. Follow the instructions on the screen to complete the upgrade.Install Windows XP to a new hard diskTo install Windows XP to a new hard disk, you must start your computer by using one of the following media:
• Microsoft Windows 98/Windows Millennium startup disk
• Windows XP boot disks
• Windows XP CD-ROMNote
If you want to start your computer from the Windows XP CD-ROM, your CD-ROM or DVD-ROM drive must be configured to do this. For information about how to configure your computer to start from the CD-ROM or DVD-ROM drive, see the documentation that is included with your computer or contact the computer manufacturer.
To install Windows XP to a new hard disk:
1. Read the End-User License Agreement, and then press F8.Note If your Windows XP CD-ROM is an upgrade, you are prompted to insert a CD-ROM of a previous operating system to verify upgrade compliance. Remove the Windows XP CD-ROM, and then insert the CD-ROM from your previous operating system into the CD-ROM drive. You can use the CD-ROM to upgrade from the following versions of Windows:Windows 98Windows 98 Second EditionWindows Millennium EditionWindows NT 4.0Windows 2000 Professional
2. When you are prompted for the Windows XP CD-ROM, remove your previous operating system CD-ROM, and then insert your Windows XP CD-ROM.
3. To install Windows XP by starting the computer from the Windows XP CD-ROM, insert the Windows XP CD-ROM into your CD-ROM or DVD-ROM drive, and then restart the computer.
4. When you see the "Press any key to boot from CD" message, press any key to start the computer from the Windows XP CD-ROM.
5. At the Welcome to Setup screen, press ENTER to start Windows XP Setup.
6. Follow the instructions on the screen to select and format a partition where you want to install Windows XP.
7. Follow the instructions on the screen to complete Windows XP Setup.Install Windows XP to a new folderTo install Windows XP to a new folder (also known as a parallel installation), you must start your computer by using one of the following media:
• Mcrosoft Windows 98/Windows Millennium Edition startup disk
• Windows XP boot disks
• Windows XP CD-ROMNote
If you want to start your computer from the Windows XP CD-ROM, your CD-ROM or DVD-ROM drive must be configured to do this. For information about how to configure your computer to start from the CD-ROM or DVD-ROM drive, please refer to the documentation that is included with your computer or contact the computer manufacturer.
1. Start your computer from the Windows XP CD-ROM. To do this, insert the Windows XP CD-ROM into your CD-ROM or DVD-ROM drive, and then restart your computer.
2. When the "Press any key to boot from CD" message appears on the screen, press any key to start the computer from the Windows XP CD-ROM.
3. At the Welcome to Setup screen, press ENTER to begin Windows XP Setup.
4. Read the End-User License Agreement, and then press F8.
5. Select the partition in which you want to install Windows XP, and then press ENTER.
6. Select the Leave the current file system intact (no changes) option, and then press ENTER to continue.
7. Press ESC to install to a different folder.
If the Setup program detects another operating system folder, it prompts you to type the name for the new folder after the back slash (\), for example, \WINXP. If there are no other operating systems detected, the Setup program automatically names the folder \Windows.
8. Press ENTER to continue.
9. Follow the instructions on the screen to complete Windows XP Setup.
Perform a clean install of Windows XPA clean installation refers to removing all data from your hard disk by repartitioning and reformatting your hard disk and reinstalling the operating system and programs to an empty (clean) hard disk.
You should back up all important information before you perform a clean installation of Windows XP.
How to partition and format a hard disk in Windows XP After you have backed up all your important information, follow these steps to install Windows XP:
1. Start your computer from the Windows XP CD-ROM.
To do this, insert the Windows XP CD-ROM into your CD drive or DVD drive, and then restart your computer.
2. When you see the "Press any key to boot from CD" message, press any key to start the computer from the Windows XP CD-ROM.
3. At the Welcome to Setup screen, press ENTER to start Windows XP Setup.
4. Read the End-User License Agreement, and then press F8.
5. Follow the instructions on the screen to select and format a partition where you want to install Windows XP.
6. Follow the instructions on the screen to complete Windows XP Setup.
APPLIES TO
•Microsoft Windows XP Professional
•Microsoft Windows XP Home Edition
Posted by donald at 12:56 AM 0 comments Links to this post
Labels: Installing Windows XP
Tuesday, November 27, 2007
Thursday, November 15, 2007
ASSIGNMENT NO.1
the K9A2 CF Motherboard - AMD 790X Chipset
MSI has just announced two new AM2+ motherboards, the value-oriented K9A2 CF and the high-end K9A2 Platinum. The K9A2 CF motherboard will be all most people need as it supports two card Crossfire and the latest quad-core Phenom processors.Check out the layout of the K9A2 below!
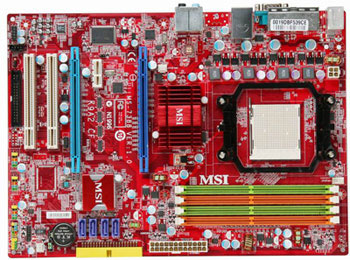
MSI’s latest K9A2 CF utilizes the latest AMD 790X chipset, supporting the new generation Socket AM2+ with dual channel DDR2 800 and enables users to overclock to higher level. In addition to being the most future-proof platform currently available, the K9A2 CF is ready to support features such as the new Quad Core Phenom processors which comes with HyperTransport 3.0, a great improvement in the chipset/CPU internal bandwidth, MSI unique technology Dual CoreCell™ with software control Dual CoreCenter, Dual VGA CrossFire, HD 7.1 channel Sound for better mainstream design!
Processors
So what's the big deal with these latest Intel Core 2 Duo processors, anyway? Well, the Merom chips introduced today take the higher power and efficiency of the desktop Core 2 Duo processors introduced a few weeks back and apply that to laptops. Intel claimed the Merom Core 2 Duo processors would show a 20% performance boost over their predecessors, the Core Duo processors used in notebooks.

But we're not going to believe Intel, are we? Trusty testers at Laptop Magazine checked out Intel's claims and it turns out the chip giant's boasts were accurate, even conservative in some cases. The testers used two identical notebooks, where the only difference was one of them had the fastest Core 2 Duo processor and the other had the fastest Core Duo processor. Sure enough, the new Core 2 Duo processor was 22% faster than the old Core Duo, while battery life was still pretty much the same. The newer processor did even better in multitasking operations.
MEMORYDDR memory, PC2100 (DDR266), PC2700 (DDR333), PC3200 (DDR400), PC4200 (DDR533). A quick look at DDR memory, what is DDR memory ? what some of the terms mean & which DDR memory to buy?
What is DDR Memory?
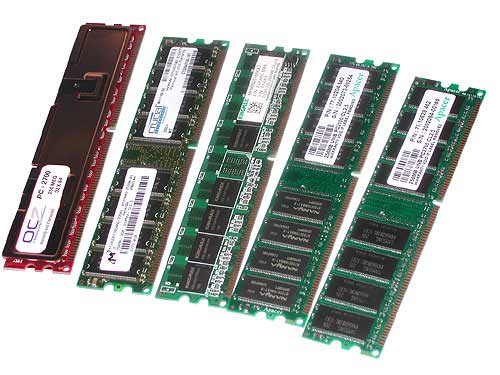
DDR memory, or Double Data Rate memory, is a new high performance type of memory that runs at twice the speed of normal SDRAM. This DDR SDRAM is ideally suited to the latest high performance processors to increase overall system speed. The faster the memory, the quicker instructions can be passed to the processor. DDR memory provides roughly a 15% boost in performance compared to regular SDRAM. With DDR memory now in the affordable price range, and motherboard manufacturers phasing out SDRAM on nearly every new board, it looks like DDR is definitely here to stay. Even corporate giant Intel dumped the once-all-mighty RAMBUS, and opted for integration of DDR support into their chipsets and motherboards, only to join forces and rise to power with the P4. Memory manufacturers are doing a good job of producing high-quality RAM for demanding systems and the ever-changing industry.
DDR memory is the latest in high-performance memory module technological advances. It offers twice the data bandwidth of conventional PC100 or PC133 SDRAM, and is particularly well suited for high-performance servers and workstations, which need optimal CPU-memory performance. Double Data Rate (DDR) SDRAM (AKA SDRAMII) is precisely what the name implies. A clock cycle can be represented as a square wave, with the rising edge defined as the transition from "0" to "1", and the falling edge as "1" to "0". In SDRAM, only one of these wave edges is used, but DDR SDRAM references both, effectively doubling the rate of data transmission. Unlike 168-pin SDRAM, DDR SDRAM utilizes a 184-pin plug. Although the basic motherboard technology does not need to be changed, DDR SDRAM is not backward compatible on motherboards designed for SDRAM.
Compaq Computer Memory
Upgrading memory on Compaq Computer, find help on issues with your Memory Upgrade
DDR memory can only be used in systems designed specifically for DDR memory
DDR Memory terms explained
What is DDR memory CAS Latency?
CAS Latency is the time needed (clock cycles) to address the data column. CAS is the Column Address Strobe. Thus CL2.5 is quicker than CL3. (2.5 <>RAS is the Row Address Strobe. Abbreviated RAS, a signal, or strobe, sent by the processor to a DRAM circuit to activate a row address. DRAM stores data in a series of rows and columns, similar in theory to a spreadsheet, and each cell where a data bit is stored exists in both a row and a column. A processor uses RAS and CAS (column address strobe) signals to retrieve data from DRAM. When data is needed, the processor activates the RAS line to specify the row where the data is needed, and then activates the CAS line to specify the column. Combined, the two signals locate the data stored in DRA
Latest Expansion Slot
if you are planning to build the ultimate gaming computer, then you may consider an NVIDIA SLI or ATI CrossFire video card configuration. This entails selecting a motherboard with SLI or CrossFire support to enable this function. These motherboards provide more than one PCI Express x16 video card slot, but not all motherboards with two PCI Express x16 slots automatically support SLI/CrossFire. Last but not least, an SLI-capable motherboard does not necessarily support CrossFire due to video card driver issues, and vice versa.

Expansion Slots
Expansion slots are used to install add-in cards such as sound cards, TV tuner cards, network interface cards and HDD/RAID cards. These add-in cards add additional functionality or connectivity to your computer. If you plan on using these cards, make sure the motherboard provides sufficient expansion slots for all your cards. One thing to remember is that PCI Express slots and PCI (PCI is not equal to PCI-X) slots are different and are not compatible with each other. Installing a PCI card into PCI Express slot is not possible, and vice versa.
Also, note that there are different specifications of PCI Express cards and they should be installed into the corresponding slots. For example, a PCI Express x1 card should be installed into a PCI Express x1 slot (or above, such as x4/x8 slot) and a PCI Express x4 slot (or above, such as x8) slot can be installed with a PCI Express x4 card.
IDE/PATA/SATA Device Ports

PATA (Parallel ATA) and SATA (Serial ATA) ports are used for the connection of hard drives and optical drives. ATA is the acronym for Advanced Technology Attachment. It has been an industry standard hard drive interface for 15 years. ATA uses a 16-bit parallel connection to make the link between storage devices and motherboards, and is also called PATA to distinguish it from the newer SATA standard. In additional, ATA is also known as IDE or EIDE (Enhanced Integrated Drive Electronics).
Subscribe to:
Posts (Atom)


